THE SONG BIRD CANVAS

To add further interest onto this canvas i went back to a wonderful set of stamps by DYLUSIONS - DOODLE PARTS - AROUND THE EDGE and FURTHER ROUND THE EDGE.
MATERIALS USED:
12 inch canvas
Collection of Acrylic Paints. Eco-Friendly Aged Gold/Pure Copper - Standard Yellow/Green/Brown Paints
White Gesso
Watered Down PVA Glue
Paint Brushes
Tim Holtz Distress Pens - For this project i used the Green Hues
White Stamping Card
Sharp tipped Scissors
Craft Knife
Water Spritzer
Heat Gun
Strong Clear Glue
Sanding Block
Moulding Paste
Glossy Acrylic Sealer
Matte Acrylic Sealer
Americana Paint - Royal Fuchsia
Bombay Indian Ink and Pen
Tim Holtz Distressing Ink Pads - Peeled Paint - Spiced Marmalade - Mowed Lawn - Frayed Burlap - Bundled Sage
Printed Elements from computer- Musical notes and Wording for Canvas
Inkssentials Glossy Accents
Double sided Foam Pads
Baby Wipes
Home Made Acrylic Paint Sprays [See separate Tutorial on this]
Before we start i would like to show a way that you can make your Acrylic Paints into a Spray. This is not my idea infact i came across it while i was surfing y-Tube. The original idea came from JANINE from Kanal von Studio. For a more informative How 2 Make can i suggest that you pay the sites a visit to hear how she did this wonderful idea.

For this project all you will need is:
Collection of your favourite Acrylic Paints
Its is quite simple to make an Acrylic Paint spray. Just collect the times that you see above [they don't have to be this brand any Acrylic Paint will work] then go the the book marked page to follow directions.
MAKING HOMEMADE SPRAY PAINTS
LETS MAKE A CANVAS:
Right then lets get back to the canvas now that we have had a workout shaking those bottles......

Taking your canvas for this occasion i wanted to use old pages from a book to give back ground detail. Please don't rip up a new book but go to Charity Shops or Car Boot Sales and give an old book a new lease of life. Once the page had been secured onto the canvas by using a PVA glue that had been watered down 50/50 and left to dry. White Gesso was then painted onto the surface. Trying to leave some areas that were still visible and others that had been covered up. By doing this you're able to add a layer of text to give interest.

Using your selected template and some moulding paste start to lay down the areas that are going to give you definition and become your focal point.

Select the Paints you want to use and start to build up colour on your canvas. One tip if i can pass to you is that i use baby wipes to help move and 'lift' colour from a canvas. Don't think that they are just useful in removing ink from your stamps they have a ton of useful aids.

Once i had stamped some background imagery i took a sanding block and started to give a distress feel to the canvas. When i had removed all the 'Dust' a coat of Matte Sealer was used. By doing this when further wet materials are added the background colours wouldn't be altered.
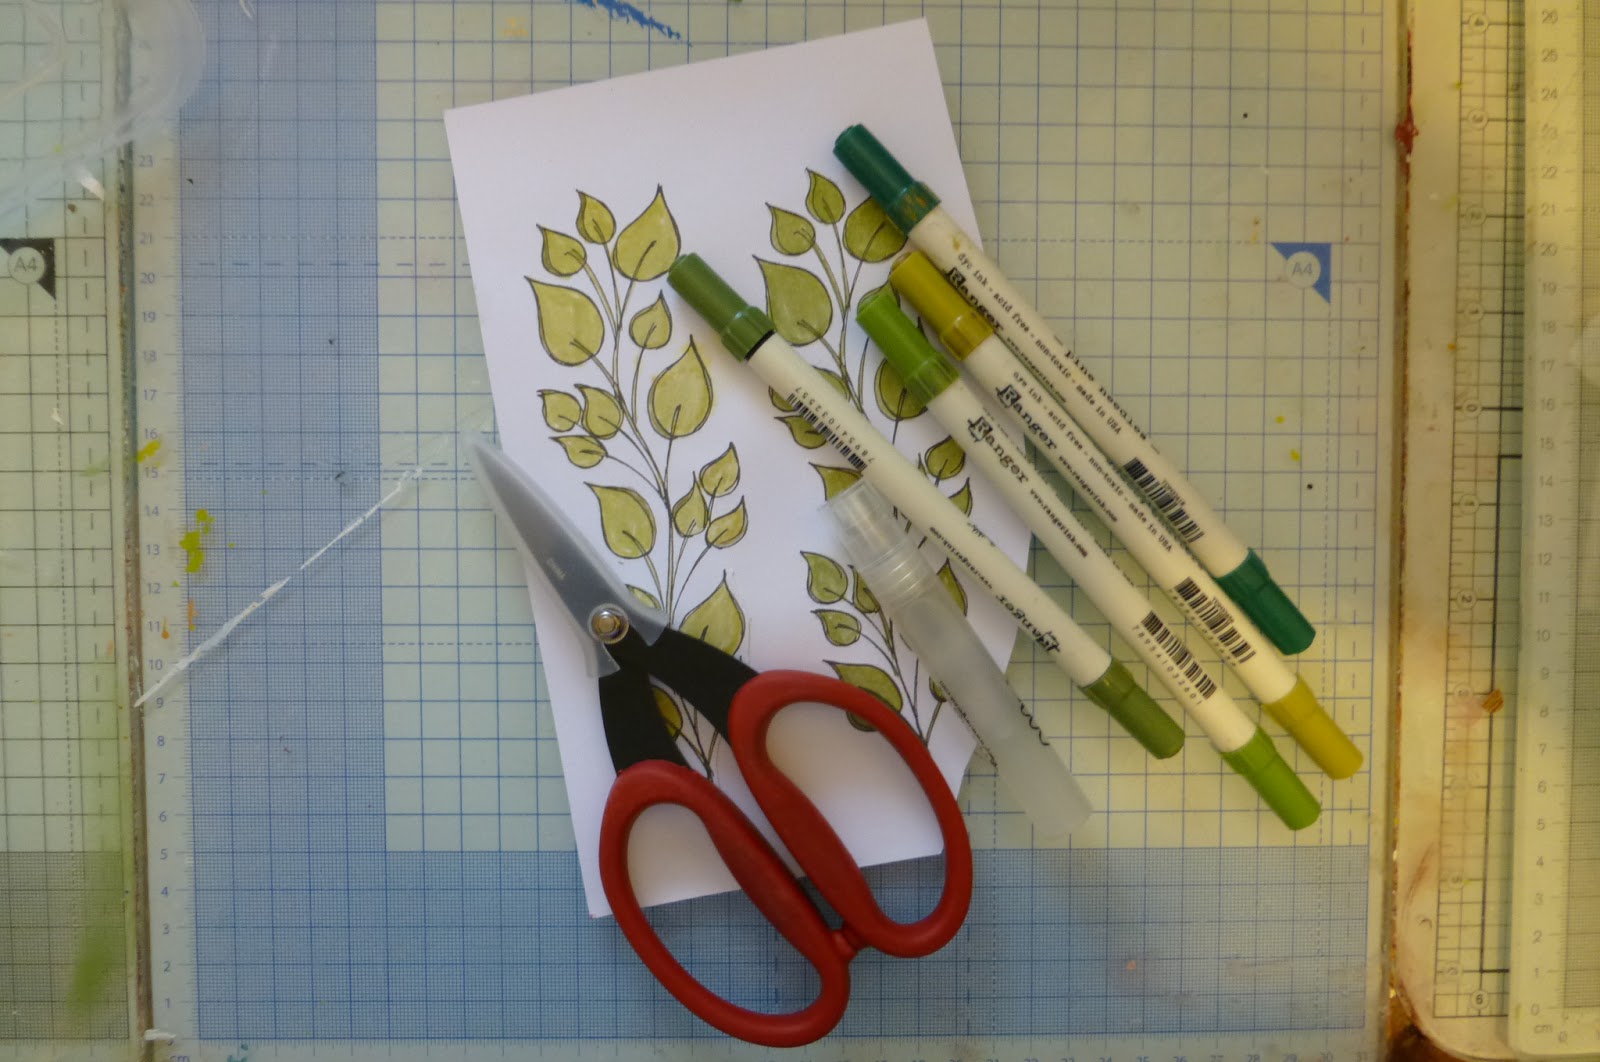
The next part of the project was to build up the layers of leaves.. By using the distressing pens to add colour. Then using a sharp tipped scissor and craft knife cut the leaves out leaving a small edge.

Using a complementary colour the edge was coloured in. This will all be explained as to why in the next few photos....


Once the stamped images had been cut out, edged and then saturated using the spitzer the 'leaves' will start to bend and distort. This can be controlled in a small way buy using a heat gun.

Here you can see how the card is twisting and becoming more interesting as a 3D image and not just a flat sheet.

Using a clear strong glue start to build up the 'sculpture' using the solid leaves as the base and the lined stamped image as the detail.

Once the leaves were in place a High Gloss Acrylic layer was placed onto the leaves. This will help protect them as well as give extra strength.

The birdcage was coloured in using a mixture of the Gold and Copper paints.

The Bird in the cage was painted and then given a high gloss seal using the Glossy Accents.

Using a selection of Brown Paints the branch was painted in, by using 3 different depths of hue your able to build up colour and definition.

After printing out the text i wanted to use and then mounted onto card using inks and the sprays i had made depth and colour are able to be made. Trying to match up the best i can and to make sure it doesn't stick out like a sore thumb.


My Home Made Sprays.....

Using Tim Holtz distressing ink pads the edges of the wording was coloured. By using two colours you're able to make the edges interesting and part of the whole project and not just glued on for no reason.
There you have it a canvas that's built up using the selected template/stencil. So don't look at these wonderful tools just as something that you put inks, paints and the such but as tools to create a stand alone project.
Any questions please send me a message and i will get back to you a.s.a.p.

Oh and if you would like to forward to me any photos of the projects you have done after being inspired by what you have read on my blog please feel free to send it to me. i would like to set up a 'Friends of asw crafting and their projects page' here on my blog.


Your canvas is absolutely awesome!!! Thanks for the canvas tutorial. I'll be making the acrylic paint sprays very soon...great tip!
ReplyDeleteFantastic canvas Alan, I love my Dylusions stamps, boy your very patient cutting them all out lol! Very interesting and easy to understand tutorial, thank you, great tip about the baby wipes xxx Zoe xx
ReplyDeleteWONDERFUL! I love this one too! I had to pin it to my Pinterest board~hope you don't mind. Great tutorials.
ReplyDeleteVicky Briggs
No Vicky l don't mind. Anyone who wants to spread the word about what lm trying to do is welcome to place on their sites as long as they let me know they have done so.
DeleteALAN....3 WORDS.....WOW WOW WOW!!!!!
ReplyDeleteLove the leaves and the bid cage Alan wooooww...amazing work....hope one day I can do a little bit similar like you...if you see my blog ....I only make simple cards (cause of the time limit as mom and as housewife and as working woman LOL)...this is really lovely..how many canvas did you made till today....love this Alan..
ReplyDeletebest regards from Munich
Monika